

This is the Matching Game I made for my Grandson E, who's just turned 2.

I had given my Cuddly Comfort flannel quilt with Matching book to T last year, so wanted to give a similar gift to E, without duplicating exactly again.

The Matching Book pages have the same motifs as the quilt, making a nice, quiet game, that can be played while cuddled under the soft, flannel quilt.
This picture doesn't show the added a square I stitched to the cover, with 'T's Matching Book' embroidered on it.
This picture doesn't show the added a square I stitched to the cover, with 'T's Matching Book' embroidered on it.
You can see more details here.
I've not made an I Spy quilt and have always liked the idea, using fun fabrics.
As a similar I Spy idea, I made it a fabric board game with fabric cards.
I took pictures through the process to share some basics with you - so you can make one too.
The size can be adjusted to larger squares.
I used 2 inch finished squares and the small bag - just his size.

I cut two squares of each of the 25 motifs - 2½" (2" finished).
Plus 25 backing fabric squares - 2½" (2" finished).
And 25 thin batting squares - 2".
Also - 10½" x 10½" backing fabric and 10" x 10" thin batting.
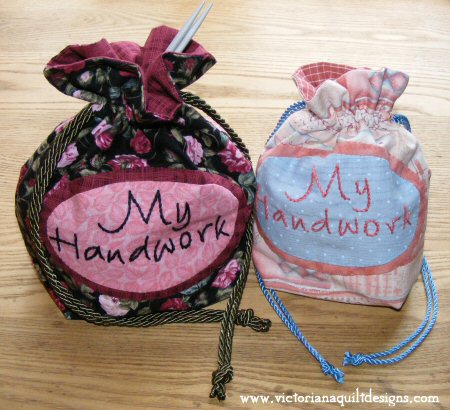
I made the bag using my directions for the small Handwork Bag I made.
You can find the fabric amounts & tutorial for making it here.

I cut a 2" cardboard template and marked around the edges, using a chalk pencil, on one set of the motif fabrics and the small backing squares.
You can see that I only used dashes, as my guide.

I arranged the second set of motif squares into five by five.
I sewed this patchwork block together into pairs, into rows and then the five rows together.
I press my seams open.
I sewed this patchwork block together into pairs, into rows and then the five rows together.
I press my seams open.

Using the chalk dashes as a guide, I folded the fabric edge, on each square, to the back and basted it in place.
I tucked a small square of batting behind each of the motif squares, before basting the seams over.
I also basted the patchwork block in the same way, with the batting tucked behind.
Plus I basted the edges of the large backing square, too.
I tucked a small square of batting behind each of the motif squares, before basting the seams over.
I also basted the patchwork block in the same way, with the batting tucked behind.
Plus I basted the edges of the large backing square, too.
Next I basted each motif to the prepared small backing squares.
And baste the patchwork 'board' to the large backing square.
And baste the patchwork 'board' to the large backing square.

I machine stitched around the edges of them all - near the edge (about 1/8").

After the stitching was done I removed the basting stitches.

This is a close up of the center square on the board.
To play - start by flipping the cards upside down - with the backing fabric facing up.
Choose one, flip it over and find the place on the board with the matching square, placing the card on the board.
Keep going until they are all on their matching square.
No winners or losers - just thinking fun!
To play - start by flipping the cards upside down - with the backing fabric facing up.
Choose one, flip it over and find the place on the board with the matching square, placing the card on the board.
Keep going until they are all on their matching square.
No winners or losers - just thinking fun!

I made the small bag with the same fabrics as my backing fabric.This picture doesn't show the added a square I stitched to one side, with 'E's Matching Game' embroidered on it.

The cards fit nicely on the bottom, and the board, folded in 3 and rolled fits above the cards.
I'm so pleased with how this sweet game turned out...and E and his parents are enjoying playing with it!
Happy Stitching!


